How to Live Stream your Church Service online
On: 2 April 2020
How to stream your church online
2020 has certainly been a year of rapid change! Bushfires, Floods and now the impact of the Coronavirus mean life is changing daily, and with the impact of recent regulations and social distancing rules, it’s impacted the way we do Church. Now more than ever we need to be connected and engaged with our community, and not being able to congregate and worship as we usually do together, in a physical location, has meant we need to get smart about how we continue to connect and share life. These days that often means using some sort of technology solution, giving us the ability to reach out into people's homes and connect with them right there. Some churches are already in this space, streaming and putting content online.
But for some of you, I can hear you say, “That's easy if you are a large church with plenty of resources and a technically skilled team, but what if I have no idea how to do live streaming or anything like that!”
Well, we are here to help! We’ll take you from absolute newbie, to live-streaming this weekend, with step-by-step instructions and without the need for any additional equipment other than your phone or laptop/desktop computer.
Let's look at how to live stream your Church on two of the most accessible platforms, Facebook and YouTube.
Facebook Live
Facebook Live is a fantastic way to get online and connecting with your church community. It is easy to use and doesn’t require any special programs or complicated equipment to quickly produce interactive live video that your whole congregation can easily experience and be part of. It also has one particularly good feature, it’s FREE!
What you need
All you need to get going with Facebook Live is a few things you probably already have.
- You need to have a Facebook account.
- You need a video device, either your smart phone or computer with a web camera.
- You need an internet connection.
With a few simple clicks in Facebook you can be streaming video online in minutes.
For all the positives of Facebook Live there are a few cons as well.
- For people to view Facebook Live streams they must have their own Facebook account to log into the Facebook app or Facebook on the web.
- You cannot schedule or prerecord content.
- There is also no ability to let your followers know your about to go live with a notification or email.
- You are unable to embed a video player on your website. The video goes direct to your Facebook feed and people must go to your page to see it.
A quick how to
Open Facebook and head to the top of the page. Simply select “Live” or “Live Video” as your post type and start streaming directly to your Facebook newsfeed. Once the stream is going, live viewers will be able to comment on, and react to, your video. Even once you have finished streaming, your video will stay in your news feed for those who want to watch later.
For a step by step guide on how to get started with Facebook Live, visit our friends over at hubspot who have made a simple and clear set of step-by-step instructions to follow. Check it out here.
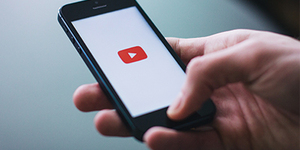
YouTube Live (more advanced)
Live Streaming your Church on YouTube is also a great choice and although there’s a couple additional steps required, it’s also FREE!
What you need
The easiest way to stream to YouTube is via a webcam and mobile phone. However, a recent change by YouTube has raised the threshold for YouTube Live from your mobile device. You need to have a YouTube Channel with at least 1000 subscribers to live stream. Let’s assume you don’t have 1000 subscribers, or perhaps even a You Tube Channel. Don’t worry, streaming live via your webcam or desktop are still options without the need for a legion of online followers.
- You’ll need a YouTube Channel. If you don’t have one, you can set one up here...it’s free.
- You’ll also need to enable your YouTube Channel for Live Streaming. Follow these instructions:
Enable YouTube for Live Streaming
Before you create a live stream, you’ll need to enable your channel for live streaming:
- Confirm that your channel is verified and that you have had no live stream restrictions in the last 90 days.
- Enable live streaming:
- On desktop, go to Creator Studio tools, then go to the "Live Streaming" tab.
- On the YouTube app on mobile, create a live stream.
Note: Enabling a live stream for the first time may take up to 24 hours. Once enabled, your stream can go live instantly.
Create a live stream via webcam
- Webcam is an easy way to go live using your computer, without the need for live streaming encoding software.
- Ensure that you’ve enabled your channel for live streaming.
- Click the upload icon in the upper right-hand corner .
- Click Go Live.
- At the top, select Webcam.
- Enter a title and description and select a privacy setting. You can also schedule your live stream for a later date.
- Click More options > Advanced Settings for more settings.
- Click Save. Your camera will then take a thumbnail picture.
- Click Go Live.
When you’re done streaming, click End Stream at the bottom. All streams under 12 hours will be automatically archived. You can access previous, current, and upcoming streams in the Live Tab.
YouTube streaming with an encoder
Another slightly more advanced option in YouTube, is to create a Live Stream with an encoder. Don’t let that scare you at all, again here’s the step by step, and it’s FREE!
Before you can start live streaming on YouTube with an encoder, you need to download encoding software. An encoder is simply an application that takes your video content and converts it into a digital format that YouTube can stream. There are lots of options free and paid, but to keep things simple, we’d recommend OBS or Open Broadcaster Software. You can download it from here and install it on your MAC, PC or Linux computer. Here’s some simple instructions to setup OBS.
- Download and setup an encoder.
- Ensure that you’ve enabled your YouTube channel for Live streaming.
- Click the upload icon in the upper right-hand corner Inserting image....
- Click Go live.
- Clicking this will take you to the Live control room, where you can set up your streams and go live.
- At the top, select Stream.
- Enter a title and description and select a privacy setting. You can also add a custom thumbnail that represents your event, schedule your live stream for a later date, or enable monetization (if eligible).
- Start your encoder. Go back to the live dashboard and wait for the preview to begin.
- Click Go live on the right-hand side.
- To end the stream, click End Stream and stop sending content from your encoder. All streams under 12 hours will be automatically archived. You can access previous, current, and upcoming streams in the Live Tab on your YouTube Studio dashboard. Learn more
Note: To access and start previously scheduled live streams, select the Manage tab.
If you like to watch videos rather than read a bunch of text...WATCH THIS.
How do I notify anyone that I’m live streaming NOW?
You will want to notify you church community or congregation that you’re live streaming Church on your YouTube Channel. It’s worth noting, that anyone who subscribes to your YouTube Channel and checks the “notification bell”, will be notified immediately when you start a Live-Stream which is a nice advantage of Live-Streaming in YouTube. Once you are streaming live, from your YouTube Channel you can share your link to your other social media accounts, (down at the bottom right sand side) or you can copy and paste your link and distribute it via any other method you prefer.
Another advantage of YouTube is you can also turn off comments to avoid any undesirable commenting happening on your video.
Forgiveness is a great attribute, but we’d still recommend testing everything before you go live so you can iron out any bugs or get some support before your actual event, to avoid technical difficulties while you congregation is watching!
The dashboard of YouTube can be an everchanging environment, but if you’d like a series of step by step pictures that show you this same process, here’s and excellent article from our friends at Social Media Examiner.
Once you’ve done it a couple of times, you’ll be an expert! Have fun with this technology and put it to good use in continuing to spread the message of hope in these extraordinary times.
A note about your audio while streaming.
In your research you might have read that when it comes to video streaming, one of the most important aspects of the whole production is your audio. Your viewers will often forgive bad video feeds and lower resolution images as long as the audio on the video is clear and sounds good. Distorted sounds and muffled voices can make the best video message hard to watch and impossible to engage with. The best solution is often the addition to your setup of some equipment like a high-quality microphone to capture your voice well. If you find your video sound is giving you a headache, reach out to our team to help find a solution. We would love to help get you sounding as good as you look


